Monday, April 11, 2016

About that bathroom....

So....this last few weeks things have gotten away from me.  Between the bathroom, my oldest's 20th birthday and Easter the time flew!

Get ready for picture overload!


My husband did a beautiful job on the floor!  I just love it!  We chose a windmill pattern and used a ceramic tile in a 12" and 4".


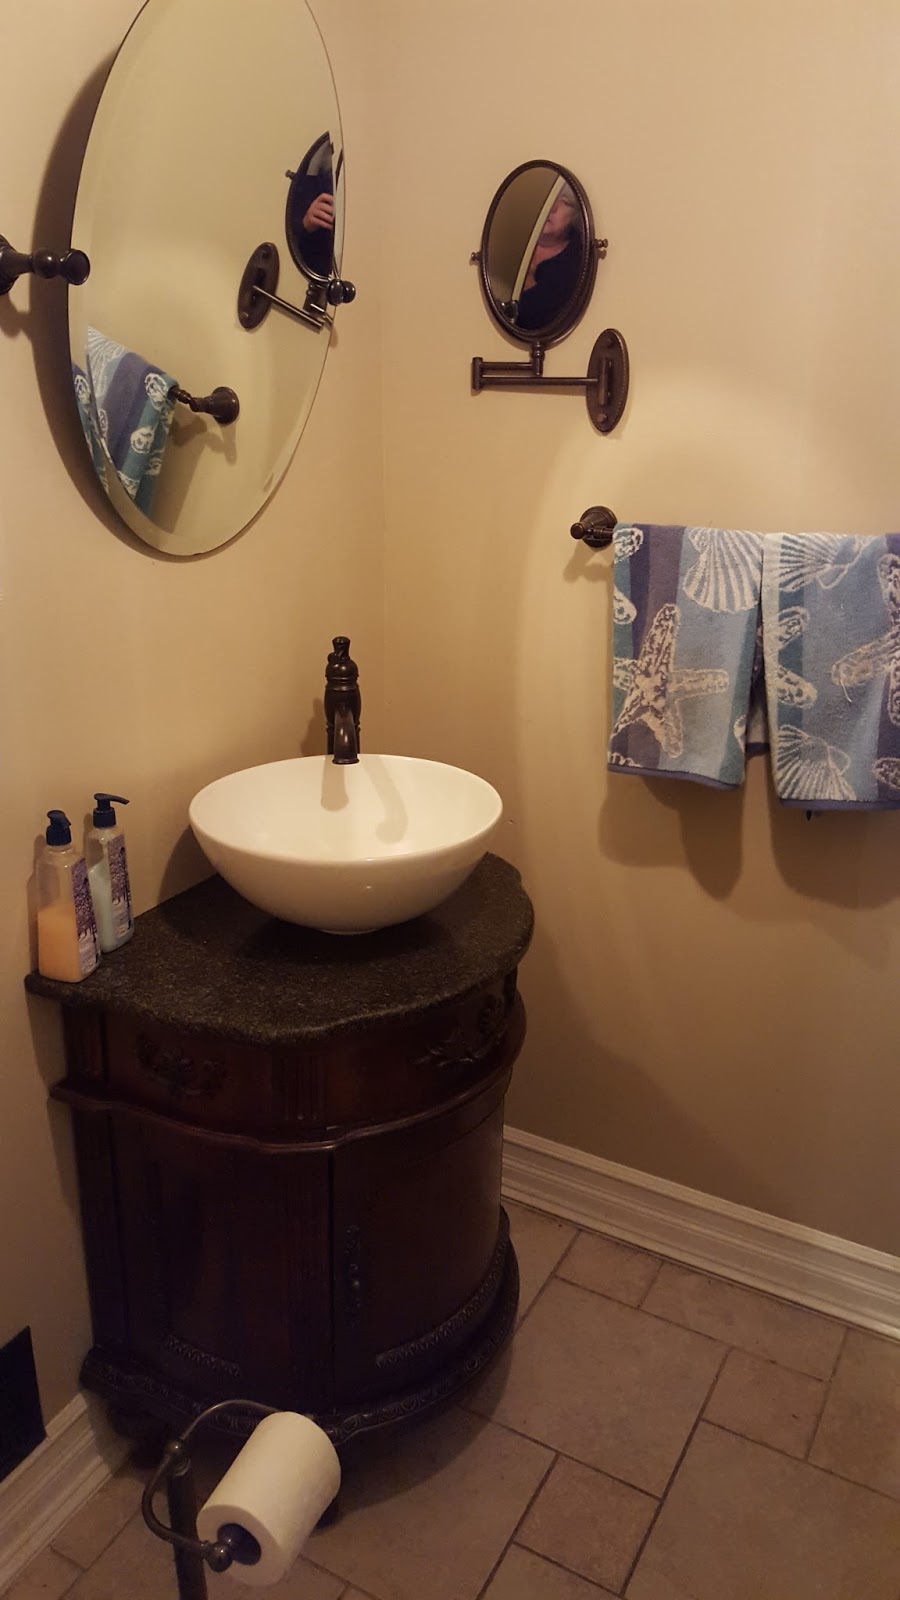
I did get to go shopping for this beauty too.  It was a complete set including the faucet, granite top, wash bowl and vanity.  I chose this mirror so the little one can tilt it to look in.  We also added the shaving mirror which is wonderful.  It telescopes and tilts so you can get a good view.  One side is regular and the other is magnifying.

.

We picked a toilet that has a top button flusher instead of the handle on the tank.  The metal finish is oil rubbed bronze which is a nice contrast with the beige walls and bright white trim.


We needed something for storage in here even when it is an actual half bath.  I looked at everything and anything!  Didn't find anything I liked.  Then, sitting in the living room, I realized this was the perfect piece.  I do want to do something about seeing all the "stuff" in it though.  But that is another project to come.  I found a seashell planter at Home Goods and plopped the pothos plant in it.  Guess it likes it's new home cause it is growing like crazy,  The lantern was a gift from a client and I added an electronic candle to it.  I had a real candle in it, but I don't like the way the wax gets all over the inside.


Loving the crown molding and corner details on the ceiling....


....and around the door.

I wanted a sparkly chandelier type of light, but my husband didn't.  I didn't want to spend alot on the fixture.  He just wanted me to get a damn light.  Oy vey.  We finally settled on this one with an Edison light bulb.


Since the most expensive part was the light bulb, I did get a medallion for it.  Guess that is a small win for me.

As for color we decided on navy blue.


I found this framed print at Hobby Lobby.  It just seemed to fit.  So I guess we are going with a coastal theme in here.

That's it for now.  I love how this room looks!  I still have to work on the window and I have a little project or two to finish up.

So off to work I go!

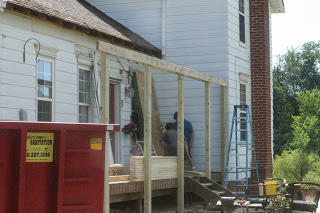
Just a reminder of what this space used to look like


Added to

Metamorphosis Monday
Digging It and Dishing It
Wow Us Wednesdays

Monday, March 14, 2016

Does Drywall Dust Have Calories?

Boy, I hope not!  My daughter told me that I looked like a ghost after all the sanding.

Did you know that drywall has a purpose?  I mean besides hiding all the ugly framework and inner workings.

In most states, it is a state requirement for houses and buildings.

Why?!

It's purpose is to be a fire barrier. To slow down a fire if it spreads.  You may have notices that it comes in different thicknesses.  Each thickness has a different rating of how much it slows down the fire.

It also comes in two different types.  The most popular is gypsum board.  This is a general, all purpose type of drywall and is generally used through out the house.

The other type is green board.  Green board is used for wet applications.  If it gets wet, it doesn't tend to "melt" like gypsum board will.  Since this is a bathroom, we are using green board in here.


It goes up the same as gypsum.  We are using screws to put ours up.  Some use nails, but it really sucks if you miss and make a dimple in the wall.

When you are putting up the drywall or green board, you want to leave as few as possible seams.  Also, beside corners, you want to butt the factory edges together.  The factory edges are slightly thinner to allow for mudding and taping.  You are going to use the smallest drywall knife for your first coat.  I put it on thick to get the tape to embed in the mud.  When you are putting the tape over the mud, use the knife again and take off the excesss mud.  Let it fully dry.  Sand smooth.  With a slightly larger knife, skim coat over the tape with more mud.  Let it dry.  Sand smooth.  Carefully look over your seam and skim coat over any areas where the tape is showing or the mud is rough.

You also want to skim coat over the screw heads.  When you are screwing down the drywall, sink the screw heads slightly below the surface of the drywall.  If when you are skimming over the screws and they show, just screw them down a bit more.  You will need to sand these smooth when they are dry also.

When you are doing the final sand, make sure the edges are feathered out and smooth.  Run your hand over it.  If you can feel an edge, you need to sand more.  It's important to get the sanding smooth.  If not, you will see every blemish when you paint.

Also, make sure that there are no bubbles in your tape.  A bubble is made when there is not enough mud under the tape.  If you do get a bubble, just cut it out with a utility knife and mud over.

Corners are a bit trickier and a royal pain.  You have two types of corners, inside and outside.  Inside corners, mud the drywall. fold the tape in half and with your fingers first, fit into the corner.  Let it dry, sand smooth and repeat with a slightly larger knife.  Outside corners you will want to use corner bead instead of tape.  There are two types of corner bead, metal and plastic.  I prefer the metal since it is easier to use.  Plastic tends to move and twist when you are taping.  Metal corner bead is more durable also.  When the room is finished, it will protect the corner better from every day use.

The hardest part is the drying time inbetween coats.  It seems like it takes FOREVER!

Got all that done?  Now it is time to prime all the new drywall and paint.

Speaking of painting....I need to get that done.

Friday, March 11, 2016

That Would Be The Gut

Well this was a messy job!


What have we gotten into?!


My poor hubby!  He worked his butt off getting everything out of here.  This is the view from the back half of the kitchen.  The old kitchen actually had two entrances to it.  We are going to use this entrance for the new bathroom.


It looks so bare now!


The window is going to stay.  Going to have to figure out something for privacy though.  Later though.  First we have to pull up the floor to get ready for new walls.


We found out when we pulled up the floor that there were several layers of flooring underneath.  These two pieces are some of the "beautiful" floors that had been installed previously.  I keep looking at these thinking that at one time someone put down this floor and was really happy to have this for their new floor.  We actually found 6 layers of floor under the top layer.


The walls are starting to go up now.  It's getting easier to visualize what the size of the room is going to be.  Before we can put up drywall, we need to run the electrical, plumbing and heat vent.  As you can see on the existing wall, there are two plugs.  We are going to remove the one closest to the new wall and keep the other one.  We are going to remove all the old wiring and upgrade it with new.  The old wiring is run in flexible conduit and really old.


Even though it seems to be going slow, we are getting alot done.

For now, I am going shopping!  I need to find a new toilet and sink for in here.

Posting at Foodie Friday
and

Tuesday, March 8, 2016

Finding My Style

So I have been given the keys to the checkbook by the hubs.  Anything that I get rid of I can replace.

Really?!

I've been thinking alot of how I want to decorate when the walls are up.  Talk about giving yourself a headache!

I think I want to keep all the high dollar pain in the ass to replace items neutral.  I would like to be able to change out colors, especially for the seasons.  I also want to keep things kinda rustic.  I really like the idea of bringing a Celtic feel to the house too.  Everyone is in this french style, which is pretty, but EVERYONE has it.  I want something different.  I love the muted colors of Ireland too.  I am not really a pastel kind of girl.

I like to decorate with pictures of my family and artwork made by the kids.  These things I love to see.  It makes me feel good looking at them.

So I have come up with an idea I want to incorporate in every room.  In every room, I want to put something old, something new, something made just for you.  I also want lots of plants, even though I suck at gardening.  Really suck.  I guess I should take some gardening lessons.

I want to take everything and just toss it out the window.  Start from scratch.  Do what I like and use what I want.

What's your decorating style?


Monday, March 7, 2016

Take a deep breath....and JUMP!

The porch is pretty much done for now with the snow.  There are a few more things to do and then the pretty stuff can start!

Now....onto the next project!

This next part is HUGE!  I am so excited for it and I think my old girl is ready too.  It is far past time.  She is a beauty and it is about time that everyone knows just how beautiful.

This project is going to be hard.  We are planning on renovating the entire house while we are living in it.  Can you say excited and scared at the same time?!  I'm worried that we are taking on too much, but thankfully my husband is a licensed contractor and knows what he is doing.  We have been doing, redoing and redoing the plans and finally have come to a great floor plan!  With this project comes rules though.

Rule 1 - ONE ROOM AT A TIME.  This is the big rule.  I don't want to have the entire house torn apart and a mess.  I mean, we do have to live here after all.

Rule 2 - NO MOVING ONTO THE NEXT ROOM TIL THE PREVIOUS ONE IS COMPLETE!  By complete, it means livable.  Not necessarily totally decorated complete.  It needs to be able to be used for the intended purpose.  Make sense?!

Now.... where to start.... 

The farmhouse has only one bathroom now.  It's on the main floor at the back of the foyer.  Since we are going to be using the foyer for more useful means, the bathroom is going to have to go.  First though, we need a new bathroom before we rip out the old one.


NOOOOO!  I worked so hard on making the bathroom beautiful!


Atleast I will have a bit of time to say good bye to her.  Where will this new bathroom go?!


So this end of the kitchen needs to be cleaned out so the cabinets and appliances can be moved.  Since the new bathroom is only going to be a half bath, there is going to be a temporary shower outside of it.  When the full bath upstairs is done, the shower will be pulled and replaced with a stackable washer/dryer.

I better get a move on.  I need to move all this stuff and set up a temporary kitchen til the new one is finished.

Oy vey....

Saturday, March 5, 2016

WTH is a spandrel?!

Spandrel?!  What's that?!

It is not to be confused with that god awful contraption invented by, more than likely, some out of shape man to make women look curvy that is a real  *&%$# to get off when you REALLY have to pee.

If it sounds like I own one of said torture contraptions, it's cause I do.

'nuff said....

A spandrel is apiece of fretwork that you usually find in the opening on a porch.  There are all kinds of spandrels.  I was told, not by Google, that it was used on Victorian porches to keep birds from flying under the porch roofs.

Huh....

I think I need some of THOSE!!


Did I mention if you are painting them more than one color, they are a real pain in the buttocks?  Yeah, they are.  I would suggest painting them before they are installed and then doing any little touch ups after.  Of course, we also had to have brackets to seem like they are holding them up too.  Now this is my kind of gingerbreading!  No calories on the hips here!


Love! the way the morning sun shines through the spandrels and brackets!

If you need me, I'll be sipping coffee on the porch.

MUUUAAAHHH!

Posting at

the stonybrook house

and

Metamorphosis Monday

Thursday, March 3, 2016

For the love of ....

Seriously?!

More freaking snow?

This was my yard last week....


Really??

My kids were off of school on Friday and Monday for Midwinter break.

Thursday, we got this....


Snow....no school for the urchins.

The weekend was gorgeous!  The snow melted and we ventured to downtown Detroit for Autorama cause that's what you do when you are from the Motor City.  It was warm enough by the river for this....


It was so warm that I, once again, cleaned up all the monster piles of dog doodoo that a Great Dane makes.

Monday was also beautiful and warm.

And then.....


....it was back!

No school Tuesday OR Wednesday!

ARE YOU KIDDING ME?!

I was about to go stir crazy....again....  Even clicking heels together didn't work.

They did FINALLY go to school today.

Now it's snowing.

This weekend it is supposed to be in the 40-50's.

Michigan where if you don't like the weather, just wait 5 minutes.  It'll change.

This time though, I am refusing to clean up the dog crap til we are in the "safe zone".

MUUUAAAHHH!

Monday, February 29, 2016

About that porch....

Things have calmed down here....finally....

I think that everyone is over the sickness we have been swapping back and forth for the last 2 weeks.  Still keeping my fingers crossed though!

So....where did we leave off?


Ahhhh yes....my mess.  It was quiet for a few weeks here too.  I think the neighbors were worried we were done.

NOT!!

In Michigan, according to building code, this porch needs a railing.  It is too high up to not have one.  I would have loved to not have a railing, but oh well.  We looked at so many railings that I was starting to get tired of looking at them!  So many options!  But in the end....

  
....we decided to make our own.  Why?!  My husband thinks it is because I like to drive him crazy.  The real reason is that I didn't want a railing like everyone else's.  Plus, our sections are different sizes too, which you will soon see.  I bought the spindles at Home Depot and my wonderful husband routed the top and bottom rails to fit.  Then we assembled them.


We also widened the steps, which I lovelovelove!  You can see on the porch fascia how narrow they were previously.  It was so hard to carry things into the house with them.  You had to kinda shimmy up sideways with groceries.


Love the detail work he did with the stair rails!


Then came the very tedious job of painting them.  I don't know who thought it would be a good idea to have them red and yellow, but they should be shot!  I wanted more of the red, since my husband wants to paint the house yellow.  The majority of the spindles are red and the "balls" are yellow.  You have no idea how happy I was when the last spindle was painted!


Remember the old door?  I was going to strip it and paint it.  I liked the old door!  

But I love the new door!  We decided to change out the door since the old one was very small and the door swing was the wrong way.  I really wanted side lights with it, but we have a change in mind that you will hopefully see later.  For now, it is just beautiful.  I love that you still get the light into the house from the door.  That is something that we lost with covering the porch, the inside light.  I'm willing to make sacrifices though!

I think that is enough for today!  I do have some more surprises in store for you though.  I am so not done with this porch!

Hopefully it won't take me 2 weeks to post them!

Until then....

MUUUUAAAAHHHH!

Friday, February 12, 2016

Glimmer Moments....

Motherhood is HARD!!!

You spend so much time raising your kids.  Kids are a blessing, don't get me wrong.  I love my kids. But there are times that I want to just scream at the top of my lungs and pull my hair out!

Brush your teeth....

Do your homework....

Eat your dinner, not the dogs....

Ugh!  I spend so much time focusing on how I am raising them that I forget to look at what they are becoming.  It seems like what they get more credit for what they don't do, than what they do do.

*do do*

*snicker*

Then come the glimmer moments.  The little moments in time that you are afforded a look at the person you are raising.  It's God's little gift to you when you are at your lowest.

Yesterday I had a glimmer moment.

The little one came home from school in tears!  Her whole world was just torn apart!  It was the Daddy Daughter dance and her dad was out of town.

Crap!

Nothing that I could do or say would console her.

Until....

....her older brother came down the stairs in a dress pants and shirt and asked if he could take her.  You should have seen her face!  It just lit up like a Christmas tree!


How awesome is that?!  He gave up a night he could of just sat at home, playing video games with his girlfriend to make his little sister happy.  It was so sweet watching them walk away holding hands.  I cried for 5 minutes.  They both came home smiling and laughing about the great time that they had too.

So, just when I started to doubt myself, I was given a glimmer moment to see the wonderful people I have raised.

I couldn't think of a better Valentines day gift than that.

MUAAAAH!

Thursday, February 4, 2016

The Sour Side of Life

When I first found out I had cancer, I wasn't ready for all the changes in my life it would bring.

Some, I knew about.  The  masectomy of course.  I knew they were taking ALL of the breast.  I was left with a Frankenstein like Barbie boob.  For a while only, until after the reconstruction.  We, me and my husband, were going into the initial surgery not knowing what to expect after.  When you have a masectomy, they do a pathology on the removed tissue in the operating room. It is at this time that your cancer is finally staged.  Up until then, it is a guessing game.

My cancer was finally staged as Stage II Lobular Breast cancer.  My cancer was estrogen and progesterone receptive.  Meaning the hormones my body produced were "feeding" the cancer and causing it to grow.  The cancer was Stage II due to the size, 3.8 cm.  They removed the sentinel nodes and the cancer hadn't spread to there, so the lymph node was clean.  There was a little twist though.  They also found cancer in the ductal glands that was just forming.  I didn't need chemo or radiation though, since I didn't score high enough.  My oncologist said that at my young age, my score didn't warrant either.  God I love it when he calls me young!

Why the little lesson in cancer?  It's a prelude dahlings.  You see my taste changed, among other things.   I craved SOMETHING.  It drove me crazy trying to find it out.

We went out to lunch one day.  No place special.  This little lake seafood cafe by our house.  We got our fish dinners and there on the plate was something that was going to change my life.  That innocent little yellow perfect wedge was what I had been craving.


Those beautiful, yellow, perfect orbs hold the key to my salvation.  The sweet, tangy liquid held beneath it's yellow skin is what I've been craving.


Is that not one of the most beautiful things you have ever seen?!

Ok, so maybe I get a little weak in the knees over them.  I always loved lemons.  Who would have thunk that during menopause, these would satisfy my soul like chocolate would?

Enough of my love affair with lemon.  This story is leading somewhere.

Pinky promise....

Every time I go shopping, lemons are always on my list. I buy lots of them every week.  I am a lemon snob though.  I don't buy the prebagged ones. Even if they are cheaper.  I like to choose my own lemons. You, unfortunately, can just squirt lemon on everything.  Somethings just need a special kind of touch.

Enter lemon curd.

I've had people that lemon curd is hard to make.

What??!!

It's so easy!  So I am going to show you a foolproof way to make lemon curd.

Lemon Curd
6 Tablespoons butter at room temp
1 cup sugar
2 large eggs
2 large egg yolks
2/3 cup freshly squeezed lemon juice
1 teaspoon lemon zest

Let your butter set out over night.  That way it will get nice and soft.  Make sure you measure it out.  It's easier to cut straight out of the fridge.  I also use unsalted butter.  It will be about 6 lemons to get your juice.  The secret to juicing a lemon is before you cut it in half, press and roll it on the counter.  Soften that baby up!  Also, wash the outside.  You are going to need it for the zest.  I use a micrograter for the zest.  You only want the yellow part.  No white here!


Now that you are all prepped and ready to go, cream your butter and sugar together in a mixer.  Get it nice and smooth.  Add your egg yolks one at a time.  Then the eggs.  Mix it all together and let everyone get to know each other for a minute or so.  

Now, add your freshly squeezed lemon juice.


It should look somewhat like this and you are probably thinking "oh crap!  screwed it up!"  Well dahling, you are right on track!  Transfer everything to a saucepan and heat over a low heat to get it all melty.

Now turn up the heat a bit.  Not much.  The sauce is going to thicken now.  Stir it constantly so you don't burn it.  No one likes burnt lemon curd.


Now when your spoon leaves a trail, you are done!  Well almost....  Stir in the lemon zest.  Once again, transfer it to another bowl, I use my glass measuring cup, cover and let cool.  Its important to cover so you don't get a skin on the top.  I lay the plastic wrap on top of the curd to make sure there is no skin.


Once it is cooled, you can put into little jars and store in the fridge.  Supposedly it will last a few weeks.  Mine is never in there for that long.  It is good on biscuits, waffles and blueberry scones.

Mmmmm.......

Know what else it is good for?

Donut filling!

Like in paczki....

Fat Tuesday is just around the corner too.

Coincidence?!

I think not....

MUUUAAAAH!

Tuesday, February 2, 2016

A Little Peek

If you looked closely at the very ugly front of my house you would get a hint of what is the next project.


Here's a little closer look....

Nothing?


What about now?!

I'M GETTING A PORCH!!

I am so excited!  I can just imagine relaxing on it on a beautiful summer day. A gentle breeze blowing.

*sigh*

For now though, there is much to do!  We stripped off the railing around the porch and the steps.


Once the railings were off, the posts and headers went up.  The boy even got in on the act since he found out there was alot of ladder work.  What is it with boys and ladders?


The rafters were scissored onto the existing ones.


Then  the decking.  Have I impressed you with my construction knowledge and terminology yet?  Well....don't be toooo impressed.  In real life I still call stuff thingamajigs.  I call it endearing.  My husband just rolls his eyes.

At this point the neighbors were hoping we were done.

Nuh huh....

I guess you will have to wait though to see what else is next.

MUAAAAH!!

Saturday, January 30, 2016

The Old Girl

Remember this girl?


I love my girl!  I remember the first time that I saw her.  She was a beauty!  She still is.

We don't really know how old our girl is.  On the books, she is listed as a 1890 farmhouse.  That was the year that the one story part of the house was added though.  Feeling adventurous, I went to the county and looked at plat maps.  There is a house and barns on our property  shown on the 1858  maps.  So like a true woman, we are not sure of her real age.  Crafty ole bird!

Our girl was starting to show her age though.  The roof was starting to wear.  The last winter had taken quite the toll on her and shingles were starting to blow off.

Crap....

I am a very lucky girl and married to a very handsome and talented contractor!


There he is!  My very own fiddler on the roof!  He's probably thinking what the heck did she talk me into now?!

You see.... it's not a simple but down a new layer of shingles.  Oh no....  The roof already had 3 layers on so we had to strip off the old shingles to put down new ones.  Code in Michigan is no more than 3 layers.  But look at what we found!


The original cedar shake roof!

Be still my heart!

We considered repairing the cedar shakes and keeping the original roof.  Big problem was having 3 layers of shingles nailed through made for lots of nail holes.  The above pic is actually after we painted it with Deck Restore.  Did not fill the holes....damn....  


Goodbye beautiful old cedar shake!  I loved you dearly for the short time that you were showing!
Okay, the bad news was I lost my cedar shake roof.  The good news is.....

....I guess you have to come back to see what it is....

MUAAAAH!